Modifying Servos: Potentiometer Clip
|
|
|
|
The Grand Wing Servo (GWS) S03 and S06, Hitec HS-422, and Futaba S148 are good examples of servos that use a small retainer clip to engage with the potentiometer. This is the easiest type of servo to modify.Simply by removing the clip the output gear will no longer turn the potentiometer shaft.
Tools needed are:
- #0 Phillips screwdriver
- 1/8" or smaller flat-bladed screwdriver
- "Nippy" cutters, X-ACTO blade, or razor saw
- Small flat jeweler's file
Test the servo for proper operation before performing the modification. Though rare, some servos fail to work right out of the box.
Throughout the following, use care to avoid wiping off or absorbing through your skin too much of the lubricant used for the servo's internal gears. If you think too much of the lubrication has been lost, you can always add more just prior to re-assembly.
The specific steps that follow are for the Hitec HS-422 servo, but most other servos using the retaining clip design are modified in much the same way.
|
|
Products of interest:
Premodified GWS S03
Universal servo mounts
Servo mount rubber wheels
|
|
|
|
Step 1:
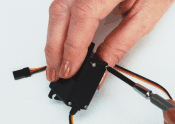
Using the Phillips screwdriver, remove the servo disc if it's attached to the output gear/shaft.
Untighten the four casing screws from the bottom of the servo. Remove the screws completely, so that you can set the servo base down on the table while working inside it. Note that on a few servos, notably the GWS S03, the case screws are removed from the top.
Observe the orientation of all the gears. Remove the center gear, being careful not to unseat its metal shaft. On the HS-422, the center gear cannot be easily removed without also lifting up the output gear. Do so, if needed. Place the center gear aside
Remove the output gear.
|
|
 |
|
|
|
Step 2:
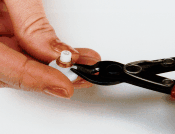
Using the nippy cutters, X-ACTO blade, or razor saw, remove the nub on the top side of the output gear. Exercise caution! The harder the plastic, the more likely the nub will break off at high speed. Wear eye protection. Always nip first on the long side, to prevent possible breakage of the output gear. When using an X-ACTO blade or razor saw, the obvious precautions against cutting your fingers off should be observed. Work slowly. |
|
 |
|
|
|
Step 3:
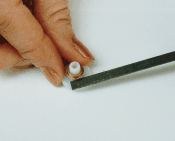
Odds are no matter what cutting technique you use, a small portion of the nub will remain. This can be filed down with a small flat file.
|
|
 |
|
|
|
Step 4:
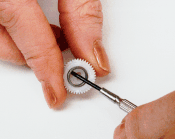
Use the small-bladed screwdriver to remove the metal retaining ring from the underside of the output gear. This ring retains the potentiometer shaft clip, and serves as a bearing surface.
|
|
 |
|
|
|
Step 5:
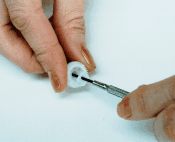
Use the small-bladed screwdriver once more to remove the potentiometer shaft clip. |
|
 |
|
|
|
Step 6:
Replace the metal retaining ring back into the output gear.
Align the potentiometer shaft so that it's centered. If needed, rotate it back and forth to find the center.
As an optional step, you may want to connect the servo to your control circuit. Apply 1.5 ms pulses. If the motor turns (even slowly), rotate the potentiometer shaft until all rotation is "nulled out."
Once set to its center, you can leave the shaft as-is, or apply a very small dab of cyanoacrylate glue (Super Glue) to keep the shaft in place. Do not apply too much glue, or the potentiometer may be damaged.
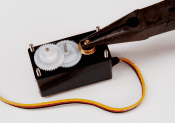
Reassemble by placing the output gear on its seat over the potentiometer. Replace the middle gear, and observe that all gears properly mesh. Add more grease at this point, if needed. Finally, replace the top case, and the four case screws.
|
|
 |
|
|
|
|
|


